¶Pendahuluan
Setelah berhasil membuat module pos, disini kita akan lanjutkan untuk pembuatan module dashboard. Module ini merupakan module terakhir sekaligus artikel terakhir dari series
¶Component Pos Index
Silahkan teman-teman buka terminal-nya, kemudian jalankan perintah berikut ini :
Terminal
php artisan make:livewire pages.dashboard.index
Setelah berhasil menjalankan perintah diatas, kita akan mendapatkan 2 buah file baru yang terletak di :
-
app/Livewire/Pages/Dashboard/Index.php
-
resources/views/livewire/pages/dashboard/index.blade.php
Silahkan teman-teman buka file App/Livewire/Pages/Dashboard/Index.php, kemudian tambahkan kode berikut ini :
Dashboard/Index.php
<?php

namespace App\Livewire\Pages\Dashboard;

use App\Models\Product;
use Livewire\Component;
use App\Models\Transaction;
use Livewire\Attributes\Title;
use Livewire\Attributes\Layout;
use Illuminate\Support\Facades\DB;

class Index extends Component
{
    // define layout
    #[Layout('layouts.app')]
    // define title
    #[Title('Dashboard')]

    public function render()
    {
        // sum grandtotal all transaction
        $revenue = Transaction::query()
            ->whereUserId(auth()->user()->id)
            ->sum('grand_total');

        // sum grandtotal transaction this month
        $monthly_revenue = Transaction::query()
            ->whereUserId(auth()->user()->id)
            ->whereMonth('created_at', date('m'))
            ->sum('grand_total');

        // count all transaction
        $transaction = Transaction::count();

        // get product out of stock
        $product_out_stocks = Product::query()
            ->with(['category' => fn($query) => $query->select('id', 'name')])
            ->select('id', 'category_id', 'name', 'quantity')
            ->where('quantity', '<=', 5)
            ->limit(8)->get();

        // get best selling product
        $best_selling_products = Product::query()
            ->select('products.id', 'products.name', DB::raw('SUM(transaction_details.quantity) as total_sold'))
            ->join('transaction_details', 'products.id', '=', 'transaction_details.product_id')
            ->groupBy('products.id', 'products.name')
            ->orderBy('total_sold', 'DESC')
            ->limit(10)
            ->get();

        // render view
        return view('livewire.pages.dashboard.index', compact('revenue', 'monthly_revenue', 'transaction', 'product_out_stocks', 'best_selling_products'));
    }
}
Pada kode diatas, pertama - tama kita mendefinisikan sebuah attribute title dan layout.
Dashboard/Index.php
// define layout
#[Layout('layouts.app')]
// define title
#[Title('Dashboard')]
Selanjutnya didalam method render kita mendefinisikan beberapa data baru diantaranya revenue, monthly_revenue, transaction, product_out_stocks, dan best_selling_products.
Dashboard/Index.php
// sum grandtotal all transaction
$revenue = Transaction::query()
    ->whereUserId(auth()->user()->id)
    ->sum('grand_total');
Pada kode diatas, kita menghitung total kolom grand_total dari tabel transactions berdasarkan user yang sedang login saat ini.
Dashboard/Index.php
// sum grandtotal transaction this month
$monthly_revenue = Transaction::query()
    ->whereUserId(auth()->user()->id)
    ->whereMonth('created_at', date('m'))
    ->sum('grand_total');
Selanjutnya kode ini kita gunakan untuk menghitung total kolom grand_total dari tabel transactions dan juga berdasarkan user yang sedang login saat ini beserta data transactions yang kita hitung hanya data transactions yang terjadi pada bulan saat ini.
Dashboard/Index.php
// count all transaction
$transaction = Transaction::count();
Berikutnya kode ini kita gunakan untuk menghitung seluruh data transactions yang terjadi.
Dashboard/Index.php
// get product out of stock
$product_out_stocks = Product::query()
    ->with(['category' => fn($query) => $query->select('id', 'name')])
    ->select('id', 'category_id', 'name', 'quantity')
    ->where('quantity', '<=', 5)
    ->limit(8)->get();
Kemudian kode ini, kita gunakan untuk menampilkan data products yang quantity stocknya kurang dari 5, dan disini kita hanya tampilkan 8 data saja.
Dashboard/Index.php
// get best selling product
$best_selling_products = Product::query()
    ->select('products.id', 'products.name', DB::raw('SUM(transaction_details.quantity) as total_sold'))
    ->join('transaction_details', 'products.id', '=', 'transaction_details.product_id')
    ->groupBy('products.id', 'products.name')
    ->orderBy('total_sold', 'DESC')
    ->limit(10)
    ->get();
Pada kode ini, kita gunakan untuk menampilkan data product dengan jumlah transactions quantity terbanyak dan disini kita hanya tampilkan 10 data saja.
Kemudian, seluruh data yang telah kita definisikan tersebut, kita lempar kedalam view dengan cara menggunakan sebuah method compact, agar data tersebut bisa kita gunakan didalam view.
Dashboard/Index.php
// render view
return view('livewire.pages.dashboard.index', compact('revenue', 'monthly_revenue', 'transaction', 'product_out_stocks', 'best_selling_products'));
¶Route Component Dashboard Index
Setelah berhasil membuat component dashboard index, sekarang kita akan lanjutkan untuk membuat route-nya, Silahkan teman - teman buka file routes/web.php, kemudian tambahkan kode berikut ini :
web.php
<?php

use Illuminate\Support\Facades\Route;
use App\Livewire\Pages\Categories\Index as CategoryIndex;
use App\Livewire\Pages\Categories\Create as CategoryCreate;
use App\Livewire\Pages\Categories\Edit as CategoryEdit;
use App\Livewire\Pages\Products\Index as ProductIndex;
use App\Livewire\Pages\Products\Create as ProductCreate;
use App\Livewire\Pages\Products\Edit as ProductEdit;
use App\Livewire\Pages\Pos\Index as PosIndex;
use App\Livewire\Pages\Dashboard\Index as DashboardIndex;


Route::view('/', 'welcome');

Route::group(['middleware' => ['auth']], function(){
    // dashboard route
    Route::get('/dashboard', DashboardIndex::class)->name('dashboard');
    // categories route
    Route::group(['prefix' => 'categories', 'as' => 'categories.'], function(){
        Route::get('/', CategoryIndex::class)->name('index');
        Route::get('/create', CategoryCreate::class)->name('create');
        Route::get('/edit/{category}', CategoryEdit::class)->name('edit');
    });
    // products route
    Route::group(['prefix' => 'products', 'as' => 'products.'], function(){
        Route::get('/', ProductIndex::class)->name('index');
        Route::get('/create', ProductCreate::class)->name('create');
        Route::get('/edit/{product}', ProductEdit::class)->name('edit');
    });
   // pos route
    Route::get('/pos', PosIndex::class)->name('pos');
});

Route::view('profile', 'profile')
    ->middleware(['auth'])
    ->name('profile');

require __DIR__.'/auth.php';
Dari perubahan kode diatas, kita menambahkan sebuah route baru dengan nama dashboard, untuk memastikan route yang kita buat berfungsi, teman - teman bisa jalankan perintah berikut ini dalam terminal.
Terminal
php artisan r:l --name=dashboard
Setelah perintah artisan diatas berhasil dijalankan maka kita akan mendapatkan output, kurang lebih seperti berikut ini.
Terminal
GET|HEAD dashboard ............................................. dashboard › App\Livewire\Pages\Dashboard\Index
¶View Component Dashboard Index
Silahkan teman - teman buka file yang bernama index.blade.php yang terletak di dalam folder resources/views/livewire/pages/dashboard, kemudian tambahkan kode berikut ini :
index.blade.php
<div class="py-12 px-4">
    <div class="max-w-7xl mx-auto sm:px-6 lg:px-8">
        <div class="grid grid-cols-1 md:grid-cols-2 lg:grid-cols-3 gap-4 items-center">
            <x-widget title="Revenue" subtitle="Total amount of revenue" :data="'IDR ' . number_format($revenue, 0)">
                <div class="p-2 rounded-lg bg-teal-100 text-teal-500">
                    <svg xmlns="http://www.w3.org/2000/svg" width="24" height="24" viewBox="0 0 24 24" fill="none"
                        stroke="currentColor" stroke-width="1.5" stroke-linecap="round" stroke-linejoin="round"
                        class="icon icon-tabler icons-tabler-outline icon-tabler-cash">
                        <path stroke="none" d="M0 0h24v24H0z" fill="none" />
                        <path d="M7 9m0 2a2 2 0 0 1 2 -2h10a2 2 0 0 1 2 2v6a2 2 0 0 1 -2 2h-10a2 2 0 0 1 -2 -2z" />
                        <path d="M14 14m-2 0a2 2 0 1 0 4 0a2 2 0 1 0 -4 0" />
                        <path d="M17 9v-2a2 2 0 0 0 -2 -2h-10a2 2 0 0 0 -2 2v6a2 2 0 0 0 2 2h2" />
                    </svg>
                </div>
            </x-widget>
            <x-widget title="Monthly Revenue" subtitle="Total revenue this month" :data="'IDR ' . number_format($monthly_revenue, 0)">
                <div class="p-2 rounded-lg bg-sky-100 text-sky-500">
                    <svg xmlns="http://www.w3.org/2000/svg" width="24" height="24" viewBox="0 0 24 24"
                        fill="none" stroke="currentColor" stroke-width="1.5" stroke-linecap="round"
                        stroke-linejoin="round"
                        class="icon icon-tabler icons-tabler-outline icon-tabler-calendar-dollar">
                        <path stroke="none" d="M0 0h24v24H0z" fill="none" />
                        <path d="M13 21h-7a2 2 0 0 1 -2 -2v-12a2 2 0 0 1 2 -2h12a2 2 0 0 1 2 2v3" />
                        <path d="M16 3v4" />
                        <path d="M8 3v4" />
                        <path d="M4 11h12.5" />
                        <path d="M21 15h-2.5a1.5 1.5 0 0 0 0 3h1a1.5 1.5 0 0 1 0 3h-2.5" />
                        <path d="M19 21v1m0 -8v1" />
                    </svg>
                </div>
            </x-widget>
            <x-widget title="Transaction" subtitle="Grand total of transactions" :data="$transaction">
                <div class="p-2 rounded-lg bg-indigo-100 text-indigo-500">
                    <svg xmlns="http://www.w3.org/2000/svg" width="24" height="24" viewBox="0 0 24 24"
                        fill="none" stroke="currentColor" stroke-width="1.5" stroke-linecap="round"
                        stroke-linejoin="round" class="icon icon-tabler icons-tabler-outline icon-tabler-invoice">
                        <path stroke="none" d="M0 0h24v24H0z" fill="none" />
                        <path d="M14 3v4a1 1 0 0 0 1 1h4" />
                        <path
                            d="M19 12v7a1.78 1.78 0 0 1 -3.1 1.4a1.65 1.65 0 0 0 -2.6 0a1.65 1.65 0 0 1 -2.6 0a1.65 1.65 0 0 0 -2.6 0a1.78 1.78 0 0 1 -3.1 -1.4v-14a2 2 0 0 1 2 -2h7l5 5v4.25" />
                    </svg>
                </div>
            </x-widget>
            <x-widget title="Product" subtitle="Grand total of the products" :data="$transaction">
                <div class="p-2 rounded-lg bg-yellow-100 text-yellow-500">
                    <svg xmlns="http://www.w3.org/2000/svg" width="24" height="24" viewBox="0 0 24 24"
                        fill="none" stroke="currentColor" stroke-width="1.5" stroke-linecap="round"
                        stroke-linejoin="round" class="icon icon-tabler icons-tabler-outline icon-tabler-box">
                        <path stroke="none" d="M0 0h24v24H0z" fill="none" />
                        <path d="M12 3l8 4.5l0 9l-8 4.5l-8 -4.5l0 -9l8 -4.5" />
                        <path d="M12 12l8 -4.5" />
                        <path d="M12 12l0 9" />
                        <path d="M12 12l-8 -4.5" />
                    </svg>
                </div>
            </x-widget>
        </div>
        <div class="grid grid-cols-1 md:grid-cols-2 gap-4 items-start py-4">
            <div>
                <div class="p-4 bg-white rounded-t-lg border">
                    <div class='flex items-center gap-2 uppercase font-semibold text-sm'>
                        Top 10 Best Selling Products
                    </div>
                </div>
                <div class="bg-white rounded-b-lg border border-t-0">
                    <div class="w-full overflow-hidden overflow-x-auto border-collapse rounded-xl">
                        <table class="w-full text-sm border-collapse">
                            <thead class="border-b">
                                <tr>
                                    <th scope="col"
                                        class="h-12 w-10 px-6 text-left align-middle font-medium whitespace-nowrap">
                                        No
                                    </th>
                                    <th scope="col"
                                        class="h-12 px-6 text-left align-middle font-medium whitespace-nowrap">
                                        Product Name
                                    </th>
                                    <th scope="col"
                                        class="h-12 px-6 text-center align-middle font-medium whitespace-nowrap">
                                        Number of Sales
                                    </th>
                                </tr>
                            </thead>
                            <tbody class="divide-y">
                                @forelse ($best_selling_products as $key => $item)
                                    <tr>
                                        <td class="whitespace-nowrap px-6 py-2 text-gray-700 rounded-b-lg text-sm">
                                            {{ $key + 1 }}</td>
                                        <td class="whitespace-nowrap px-6 py-2 text-gray-700 rounded-b-lg text-sm">
                                            {{ $item->name }}
                                        </td>
                                        <td
                                            class="whitespace-nowrap px-6 py-2 text-gray-700 rounded-b-lg text-sm text-center">
                                            {{ $item->total_sold }}
                                        </td>
                                    </tr>
                                @empty
                                    <tr>
                                        <td colspan="4"
                                            class="whitespace-nowrap px-6 py-2 text-rose-700 rounded-b-lg text-sm text-center">
                                            Sorry, we couldn't find anything...
                                        </td>
                                    </tr>
                                @endforelse
                            </tbody>
                        </table>
                    </div>
                </div>
            </div>
            <div>
                <div class="p-4 bg-white rounded-t-lg border">
                    <div class='flex items-center gap-2 uppercase font-semibold text-sm'>
                        Product out of Stock
                    </div>
                </div>
                <div class="bg-white rounded-b-lg border border-t-0">
                    <div class="w-full overflow-hidden overflow-x-auto border-collapse rounded-xl">
                        <table class="w-full text-sm border-collapse">
                            <thead class="border-b">
                                <tr>
                                    <th scope="col"
                                        class="h-12 w-10 px-6 text-left align-middle font-medium whitespace-nowrap">
                                        No
                                    </th>
                                    <th scope="col"
                                        class="h-12 px-6 text-left align-middle font-medium whitespace-nowrap">
                                        Product Name
                                    </th>
                                    <th scope="col"
                                        class="h-12 px-6 text-left align-middle font-medium whitespace-nowrap">
                                        Product Category
                                    </th>
                                    <th scope="col"
                                        class="h-12 px-6 text-center align-middle font-medium whitespace-nowrap">
                                        Product Quantity
                                    </th>
                                </tr>
                            </thead>
                            <tbody class="divide-y">
                                @forelse ($product_out_stocks as $key => $item)
                                    <tr>
                                        <td class="whitespace-nowrap px-6 py-2 text-gray-700 rounded-b-lg text-sm">
                                            {{ $key + 1 }}</td>
                                        <td class="whitespace-nowrap px-6 py-2 text-gray-700 rounded-b-lg text-sm">
                                            {{ $item->name }}
                                        </td>
                                        <td class="whitespace-nowrap px-6 py-2 text-gray-700 rounded-b-lg text-sm">
                                            {{ $item->category->name }}
                                        </td>
                                        <td
                                            class="whitespace-nowrap px-6 py-2 text-gray-700 rounded-b-lg text-sm text-center">
                                            {{ $item->quantity }}
                                        </td>
                                    </tr>
                                @empty
                                    <tr>
                                        <td colspan="4"
                                            class="whitespace-nowrap px-6 py-2 text-rose-700 rounded-b-lg text-sm text-center">
                                            Sorry, we couldn't find anything...
                                        </td>
                                    </tr>
                                @endforelse
                            </tbody>
                        </table>
                    </div>
                </div>
            </div>
        </div>
    </div>
</div>
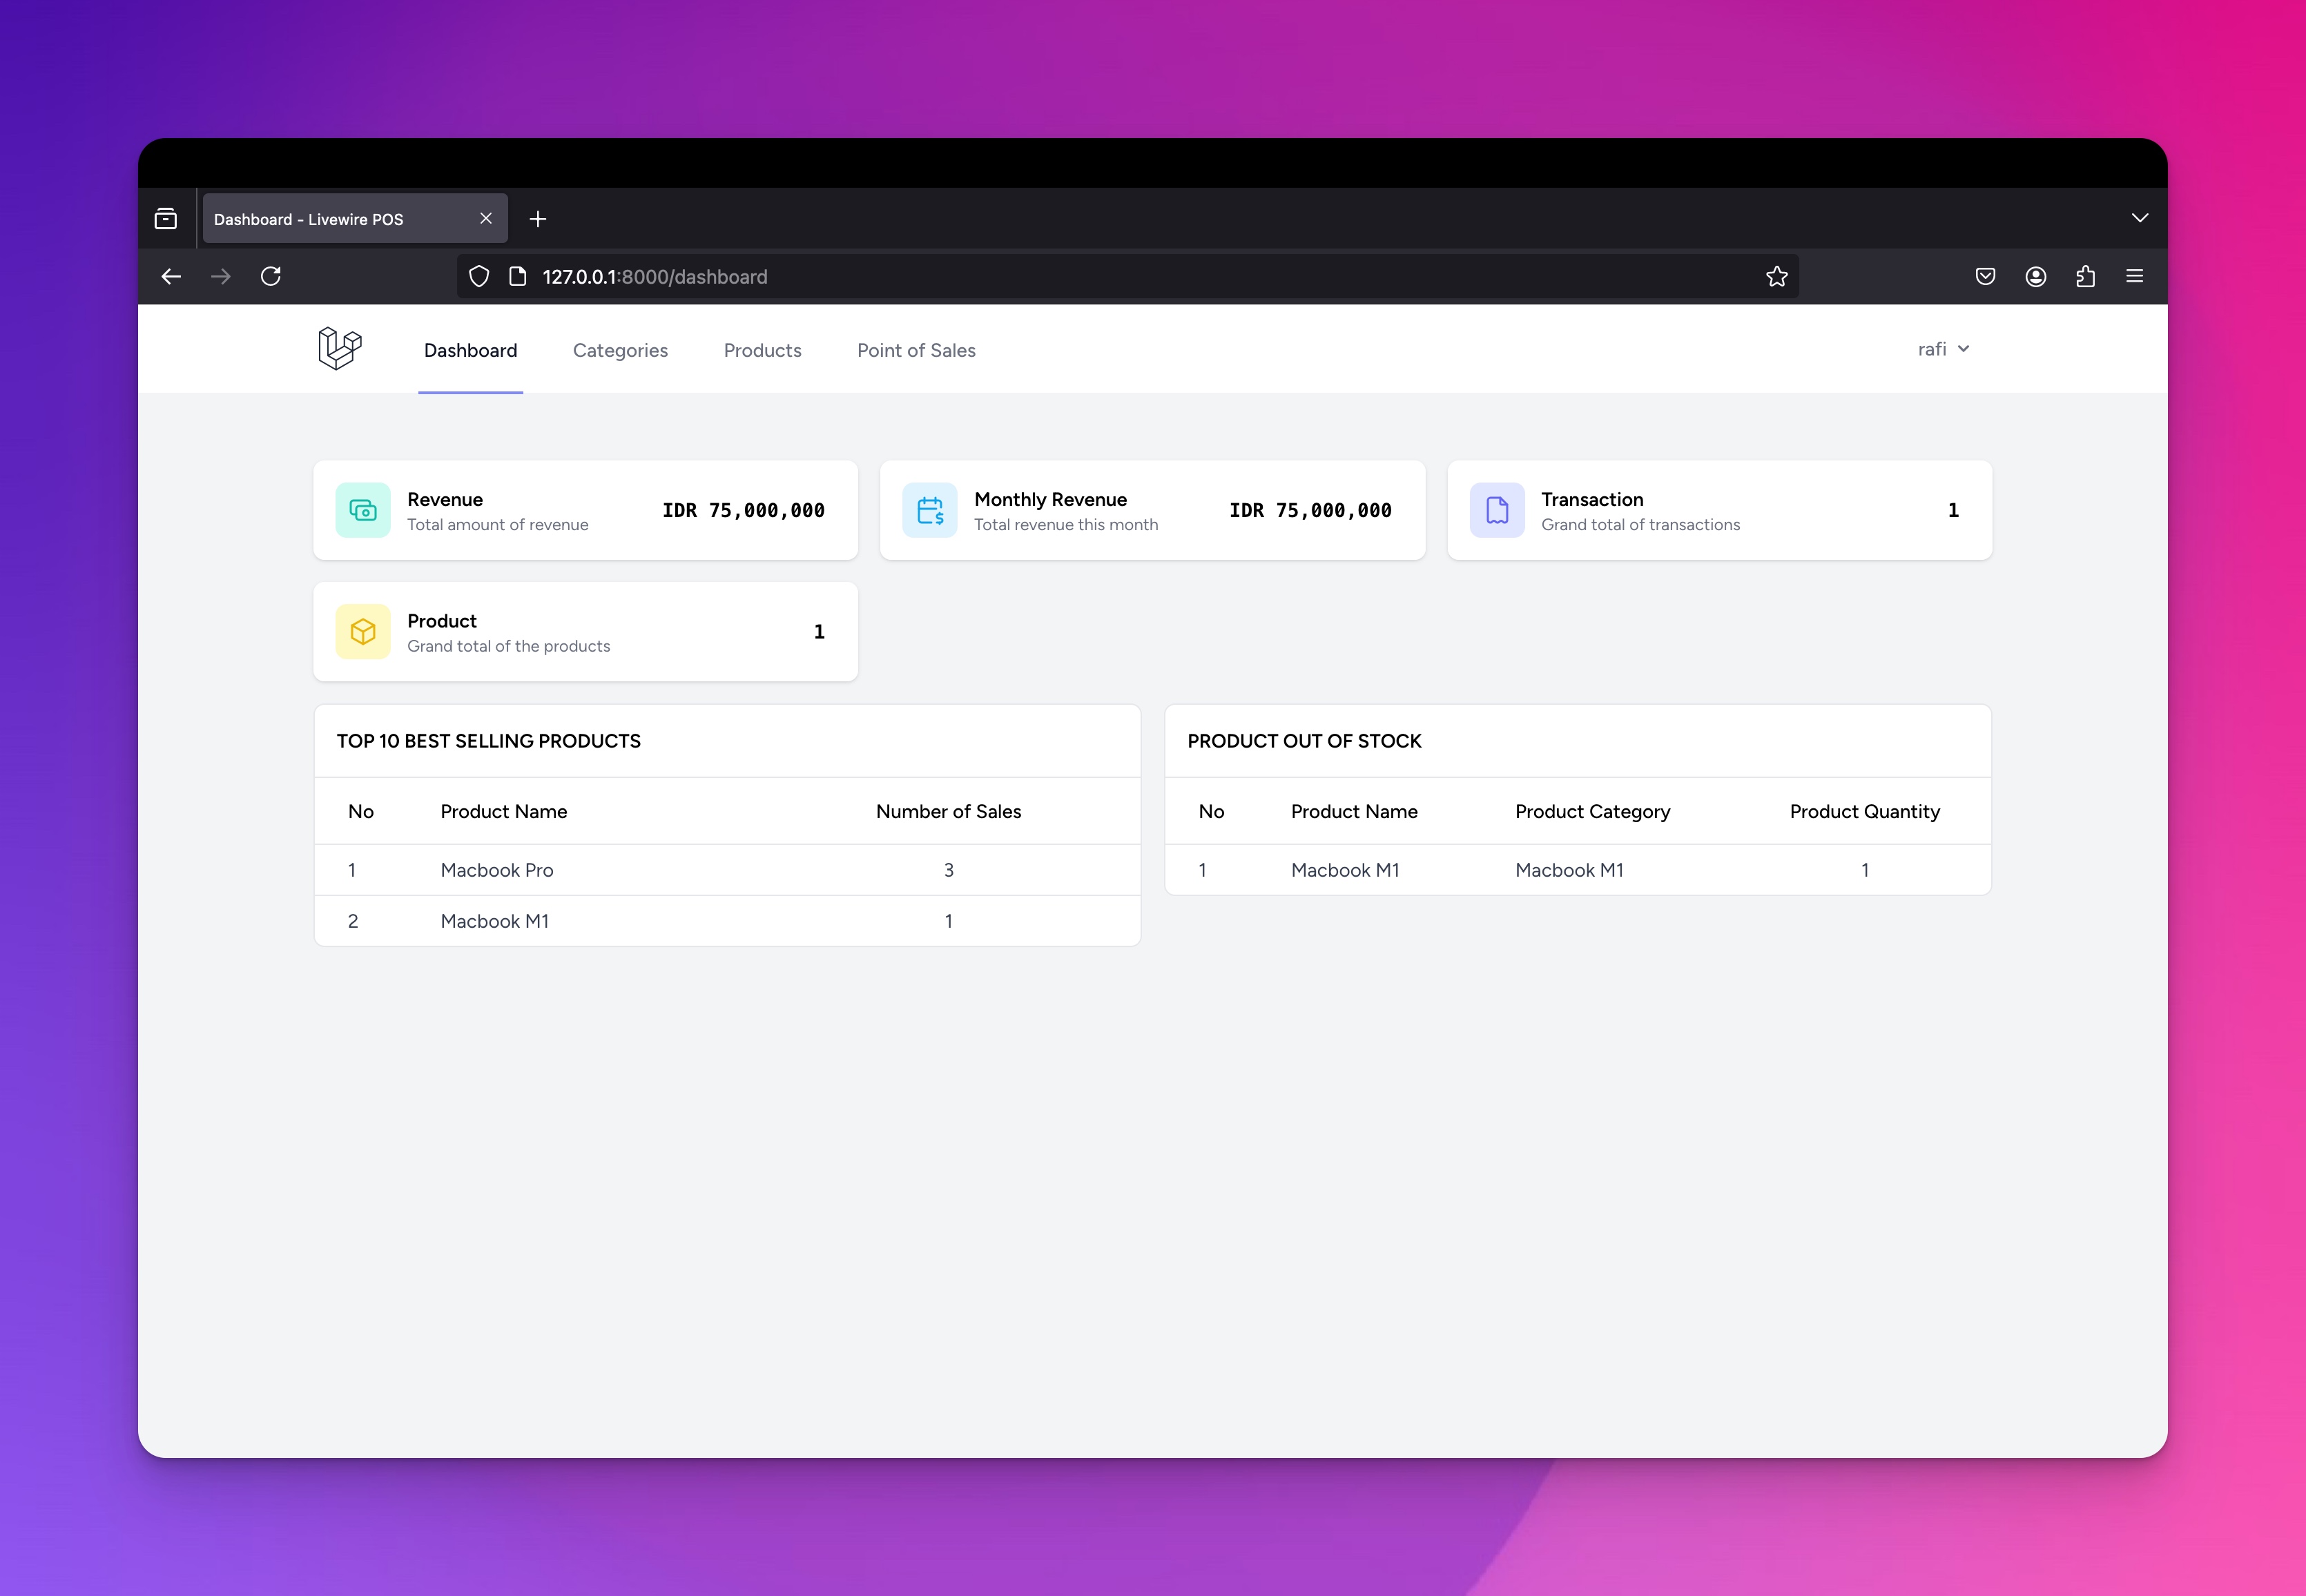
Pada kode diatas, kita hanya melakukan pemanggilan component <x-widget/> dengan props title, subtitle, dan data.
Seluruh varibel data diatas kita dapatkan dari passing data yang ada di component dashboard index didalam method render().
¶Fixing Route Profile
Jika teman - teman akses route profile maka teman - teman akan mengalami error seperti gambar dibawah ini, error ini terjadi dikarenakan kita telah mengubah component modal bawaan dari livewire.
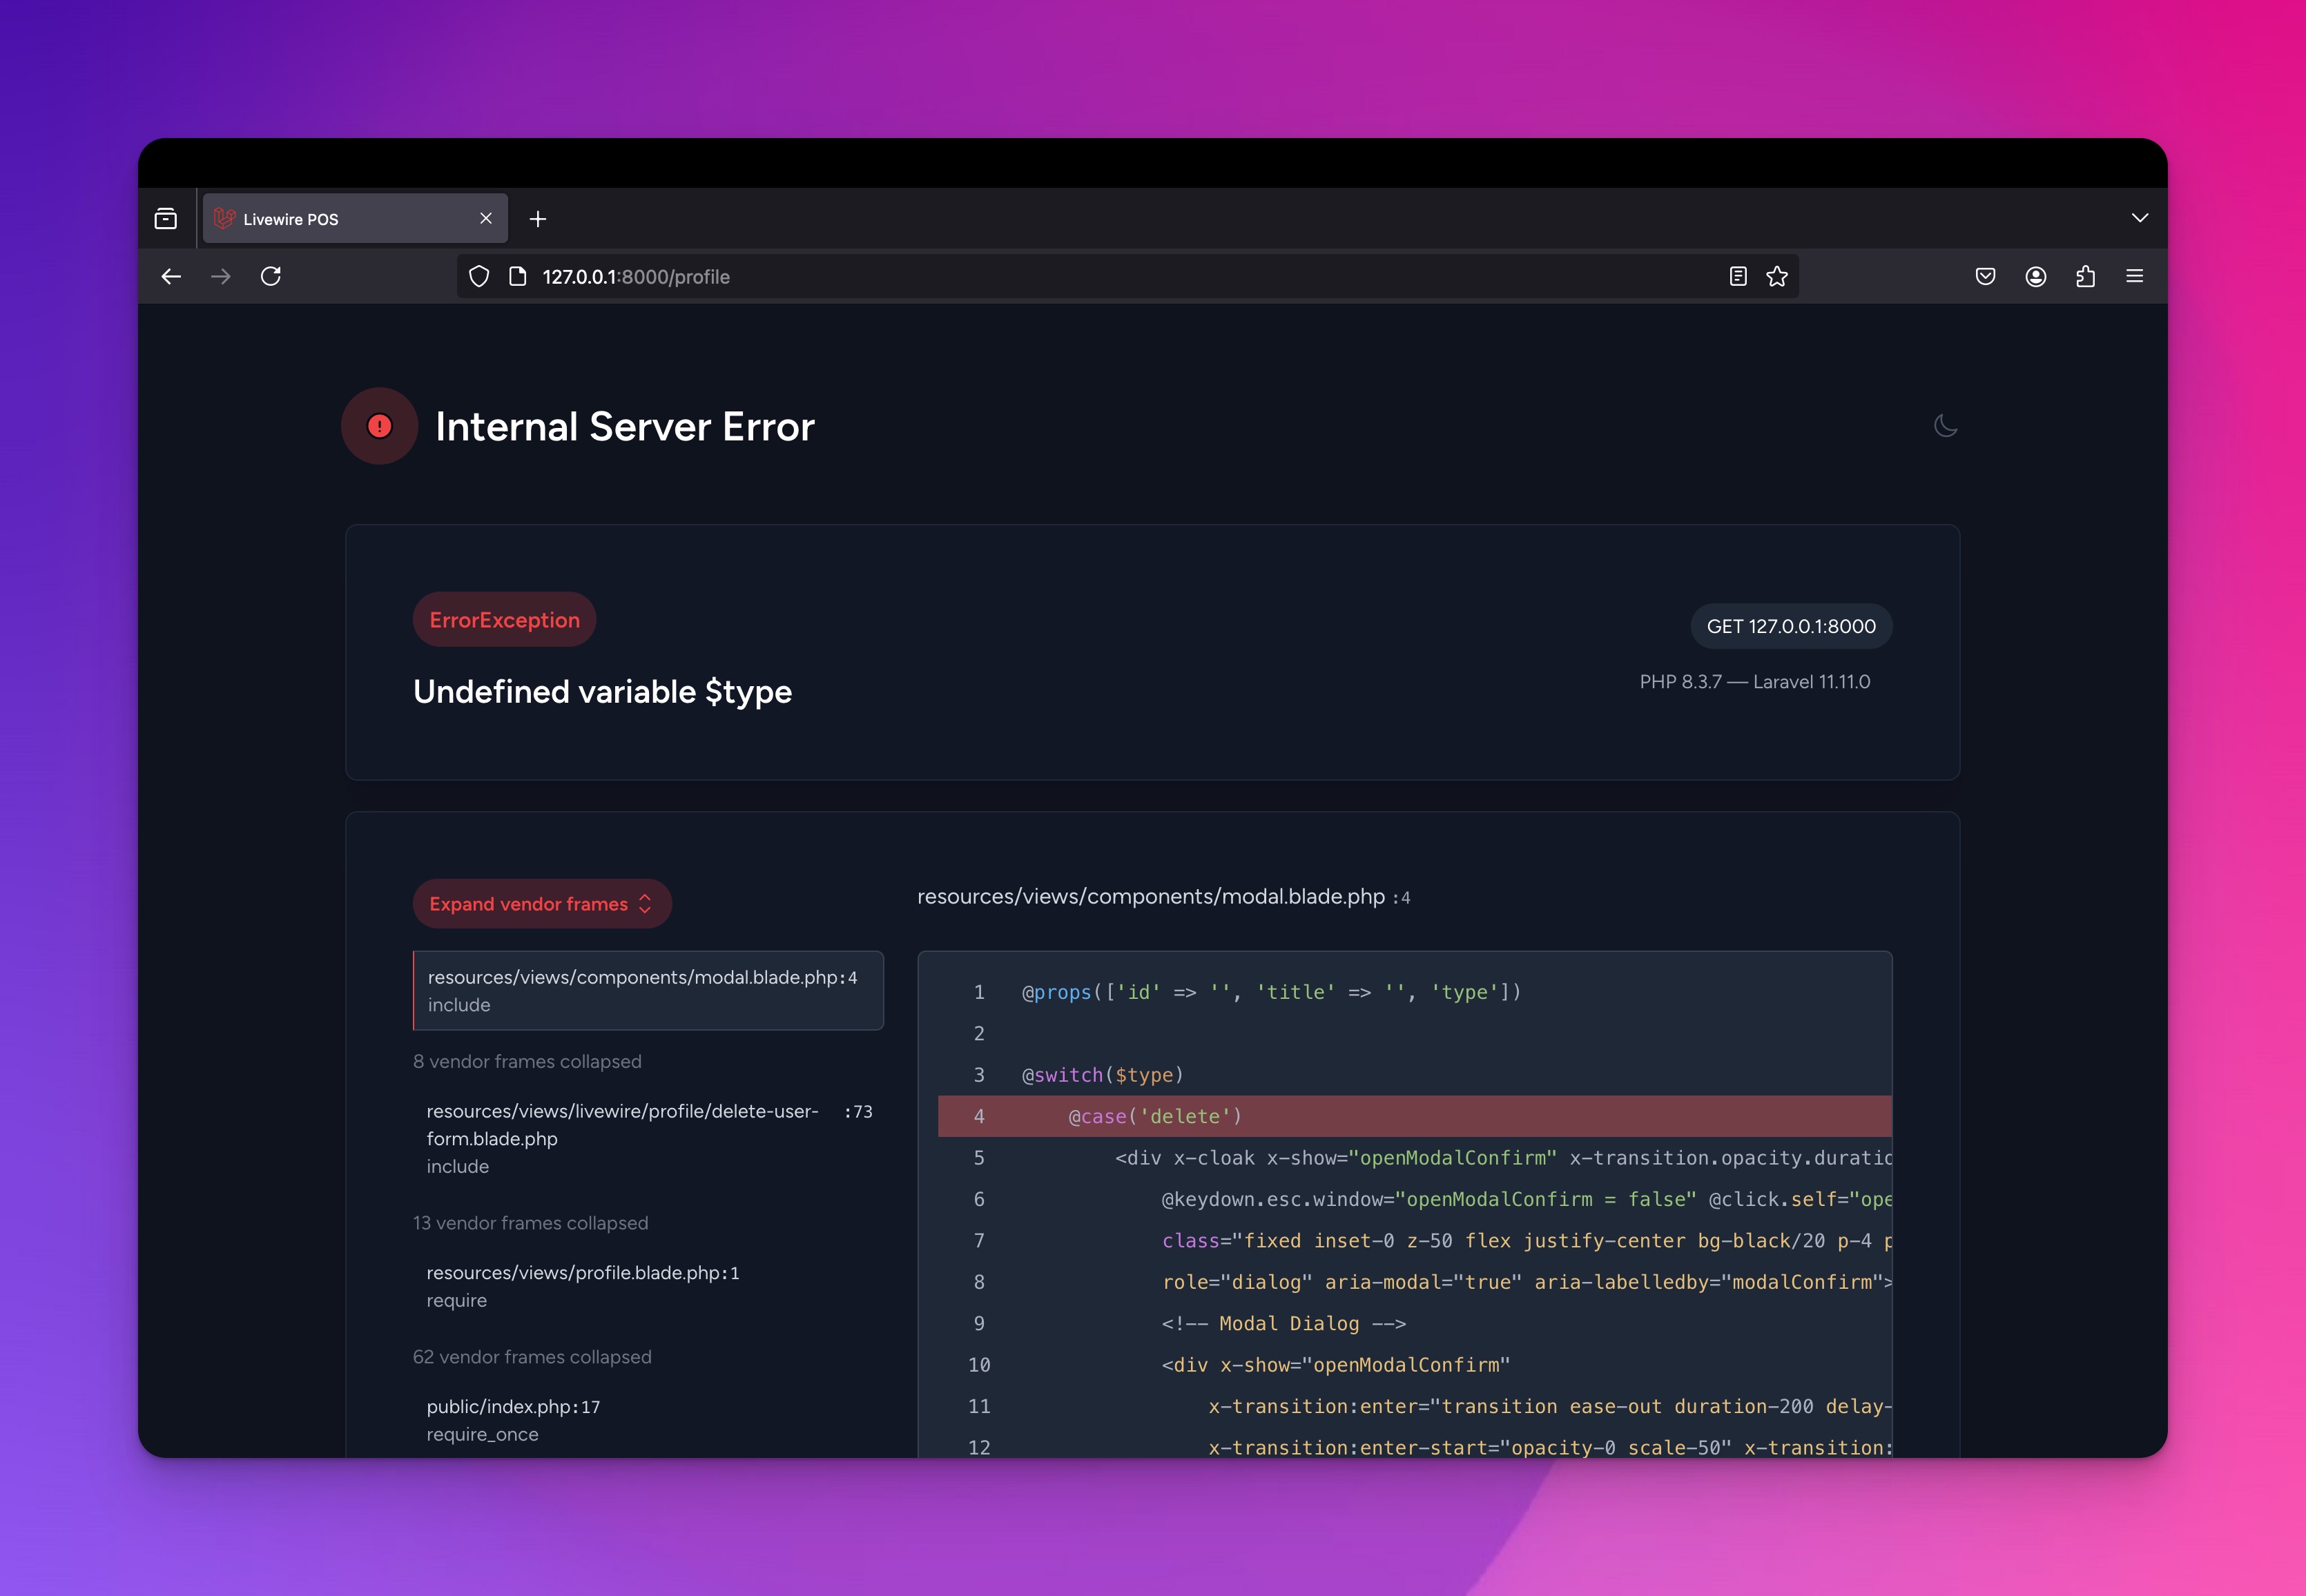
Untuk mengatasi hal tersebut teman - teman bisa buat file baru dengan nama modal-profile.blade.php didalam folder resources/views/components, kemudian masukan kode berikut ini.
modal-profile.blade.php
@props([
    'name',
    'show' => false,
    'maxWidth' => '2xl'
])

@php
$maxWidth = [
    'sm' => 'sm:max-w-sm',
    'md' => 'sm:max-w-md',
    'lg' => 'sm:max-w-lg',
    'xl' => 'sm:max-w-xl',
    '2xl' => 'sm:max-w-2xl',
][$maxWidth];
@endphp

<div
    x-data="{
        show: @js($show),
        focusables() {
            // All focusable element types...
            let selector = 'a, button, input:not([type=\'hidden\']), textarea, select, details, [tabindex]:not([tabindex=\'-1\'])'
            return [...$el.querySelectorAll(selector)]
                // All non-disabled elements...
                .filter(el => ! el.hasAttribute('disabled'))
        },
        firstFocusable() { return this.focusables()[0] },
        lastFocusable() { return this.focusables().slice(-1)[0] },
        nextFocusable() { return this.focusables()[this.nextFocusableIndex()] || this.firstFocusable() },
        prevFocusable() { return this.focusables()[this.prevFocusableIndex()] || this.lastFocusable() },
        nextFocusableIndex() { return (this.focusables().indexOf(document.activeElement) + 1) % (this.focusables().length + 1) },
        prevFocusableIndex() { return Math.max(0, this.focusables().indexOf(document.activeElement)) -1 },
    }"
    x-init="$watch('show', value => {
        if (value) {
            document.body.classList.add('overflow-y-hidden');
            {{ $attributes->has('focusable') ? 'setTimeout(() => firstFocusable().focus(), 100)' : '' }}
        } else {
            document.body.classList.remove('overflow-y-hidden');
        }
    })"
    x-on:open-modal.window="$event.detail == '{{ $name }}' ? show = true : null"
    x-on:close-modal.window="$event.detail == '{{ $name }}' ? show = false : null"
    x-on:close.stop="show = false"
    x-on:keydown.escape.window="show = false"
    x-on:keydown.tab.prevent="$event.shiftKey || nextFocusable().focus()"
    x-on:keydown.shift.tab.prevent="prevFocusable().focus()"
    x-show="show"
    class="fixed inset-0 overflow-y-auto px-4 py-6 sm:px-0 z-50"
    style="display: {{ $show ? 'block' : 'none' }};"
>
    <div
        x-show="show"
        class="fixed inset-0 transform transition-all"
        x-on:click="show = false"
        x-transition:enter="ease-out duration-300"
        x-transition:enter-start="opacity-0"
        x-transition:enter-end="opacity-100"
        x-transition:leave="ease-in duration-200"
        x-transition:leave-start="opacity-100"
        x-transition:leave-end="opacity-0"
    >
        <div class="absolute inset-0 bg-gray-500 opacity-75"></div>
    </div>

    <div
        x-show="show"
        class="mb-6 bg-white rounded-lg overflow-hidden shadow-xl transform transition-all sm:w-full {{ $maxWidth }} sm:mx-auto"
        x-transition:enter="ease-out duration-300"
        x-transition:enter-start="opacity-0 translate-y-4 sm:translate-y-0 sm:scale-95"
        x-transition:enter-end="opacity-100 translate-y-0 sm:scale-100"
        x-transition:leave="ease-in duration-200"
        x-transition:leave-start="opacity-100 translate-y-0 sm:scale-100"
        x-transition:leave-end="opacity-0 translate-y-4 sm:translate-y-0 sm:scale-95"
    >
        {{ $slot }}
    </div>
</div>
Setelah berhasil membuat component tersebut silahkan teman - teman buka file yang bernama delete-user-form.blade.php yang terletak di folder resources/views/livewire/profile, kemudian ubah semua kodenya menjadi seperti berikut ini.
delete-user-form.blade.php
<?php

use App\Livewire\Actions\Logout;
use Illuminate\Support\Facades\Auth;
use Livewire\Volt\Component;

new class extends Component
{
    public string $password = '';

    /**
     * Delete the currently authenticated user.
     */
    public function deleteUser(Logout $logout): void
    {
        $this->validate([
            'password' => ['required', 'string', 'current_password'],
        ]);

        tap(Auth::user(), $logout(...))->delete();

        $this->redirect('/', navigate: true);
    }
}; ?>

<section class="space-y-6">
    <header>
        <h2 class="text-lg font-medium text-gray-900">
            {{ __('Delete Account') }}
        </h2>

        <p class="mt-1 text-sm text-gray-600">
            {{ __('Once your account is deleted, all of its resources and data will be permanently deleted. Before deleting your account, please download any data or information that you wish to retain.') }}
        </p>
    </header>

    <x-danger-button
        x-data=""
        x-on:click.prevent="$dispatch('open-modal', 'confirm-user-deletion')"
    >{{ __('Delete Account') }}</x-danger-button>

    <x-modal-profile name="confirm-user-deletion" :show="$errors->isNotEmpty()" focusable>
        <form wire:submit="deleteUser" class="p-6">

            <h2 class="text-lg font-medium text-gray-900">
                {{ __('Are you sure you want to delete your account?') }}
            </h2>

            <p class="mt-1 text-sm text-gray-600">
                {{ __('Once your account is deleted, all of its resources and data will be permanently deleted. Please enter your password to confirm you would like to permanently delete your account.') }}
            </p>

            <div class="mt-6">
                <x-input-label for="password" value="{{ __('Password') }}" class="sr-only" />

                <x-text-input
                    wire:model="password"
                    id="password"
                    name="password"
                    type="password"
                    class="mt-1 block w-3/4"
                    placeholder="{{ __('Password') }}"
                />

                <x-input-error :messages="$errors->get('password')" class="mt-2" />
            </div>

            <div class="mt-6 flex justify-end">
                <x-secondary-button x-on:click="$dispatch('close')">
                    {{ __('Cancel') }}
                </x-secondary-button>

                <x-danger-button class="ms-3">
                    {{ __('Delete Account') }}
                </x-danger-button>
            </div>
        </form>
    </x-modal-profile>
</section>
Langkah berikutnya teman - teman bisa buka file yang bernama profile.blade.php yang terletak di folder resources/views, kemudian masukan kode berikut ini.
profile.blade.php
<x-app-layout>
    <x-slot name="title">
        Profile
    </x-slot>

    <x-slot name="header">
        <h2 class="font-semibold text-xl text-gray-800 leading-tight">
            {{ __('Profile') }}
        </h2>
    </x-slot>

    <div class="py-12">
        <div class="max-w-7xl mx-auto sm:px-6 lg:px-8 space-y-6">
            <div class="p-4 sm:p-8 bg-white shadow sm:rounded-lg">
                <div class="max-w-xl">
                    <livewire:profile.update-profile-information-form />
                </div>
            </div>

            <div class="p-4 sm:p-8 bg-white shadow sm:rounded-lg">
                <div class="max-w-xl">
                    <livewire:profile.update-password-form />
                </div>
            </div>

            <div class="p-4 sm:p-8 bg-white shadow sm:rounded-lg">
                <div class="max-w-xl">
                    <livewire:profile.delete-user-form />
                </div>
            </div>
        </div>
    </div>
</x-app-layout>
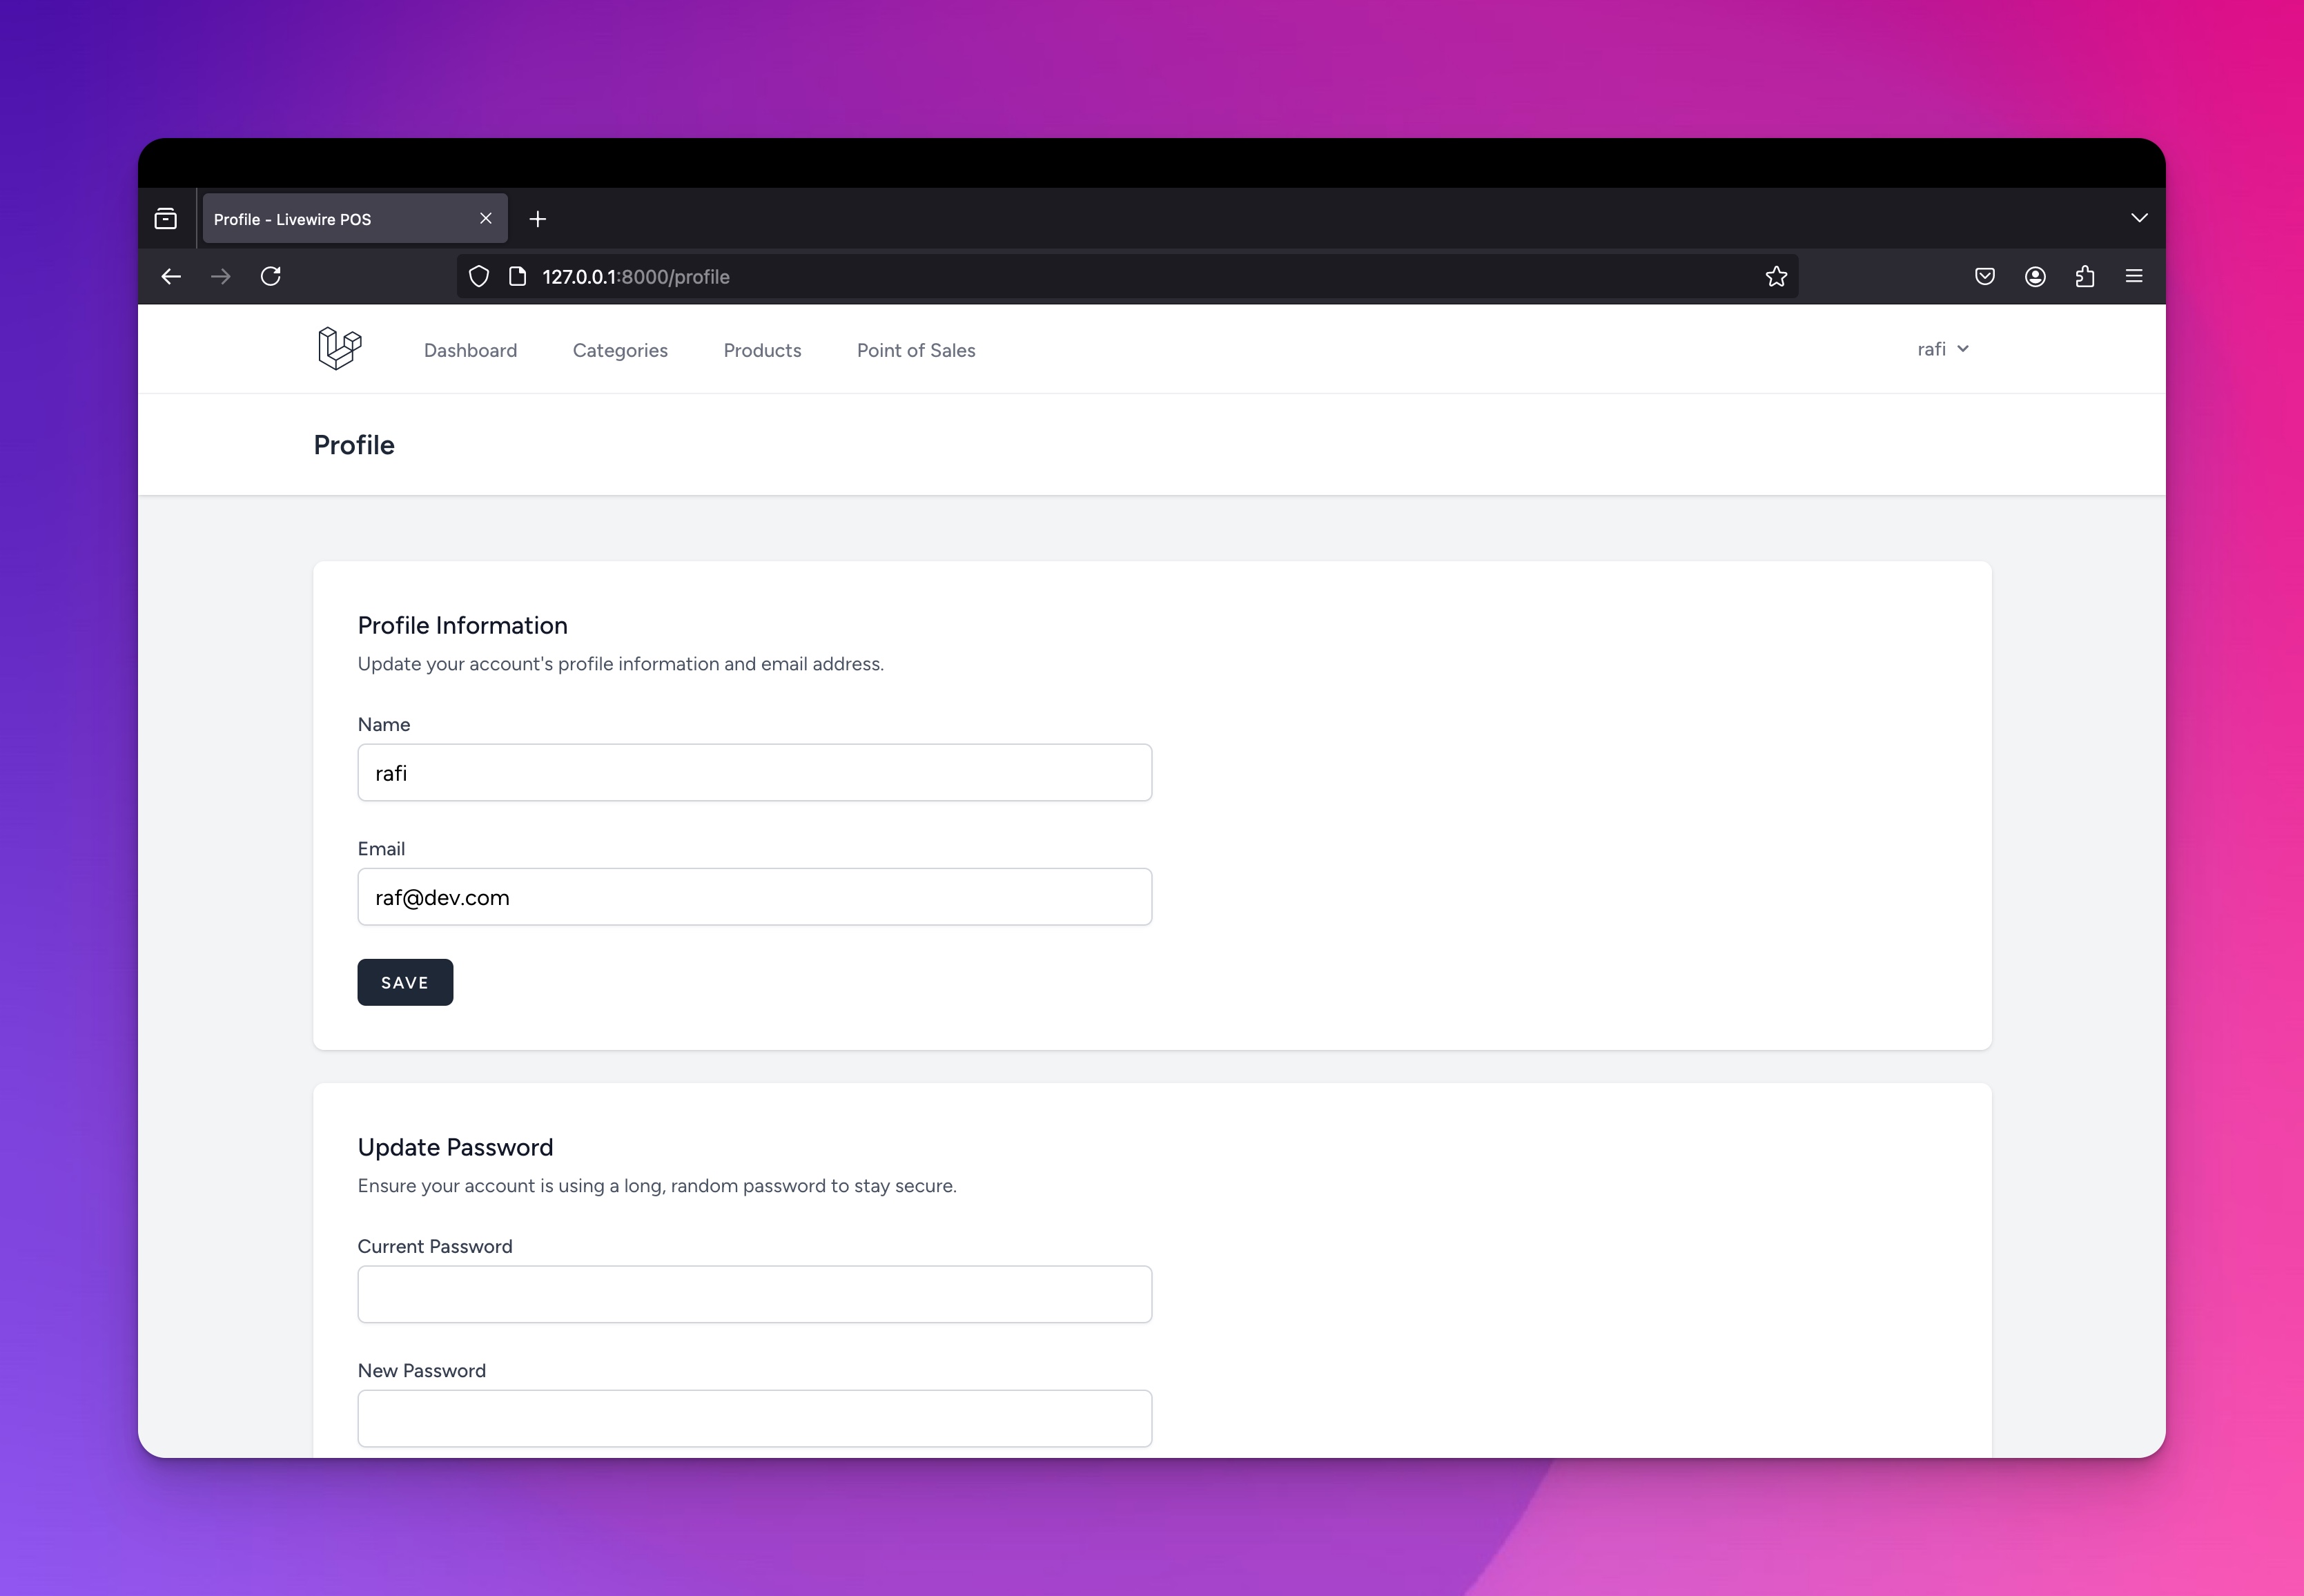
Selanjutnya teman - teman bisa kunjungi route profile maka akan tampil seperti berikut ini.
¶Screenshoot Hasil

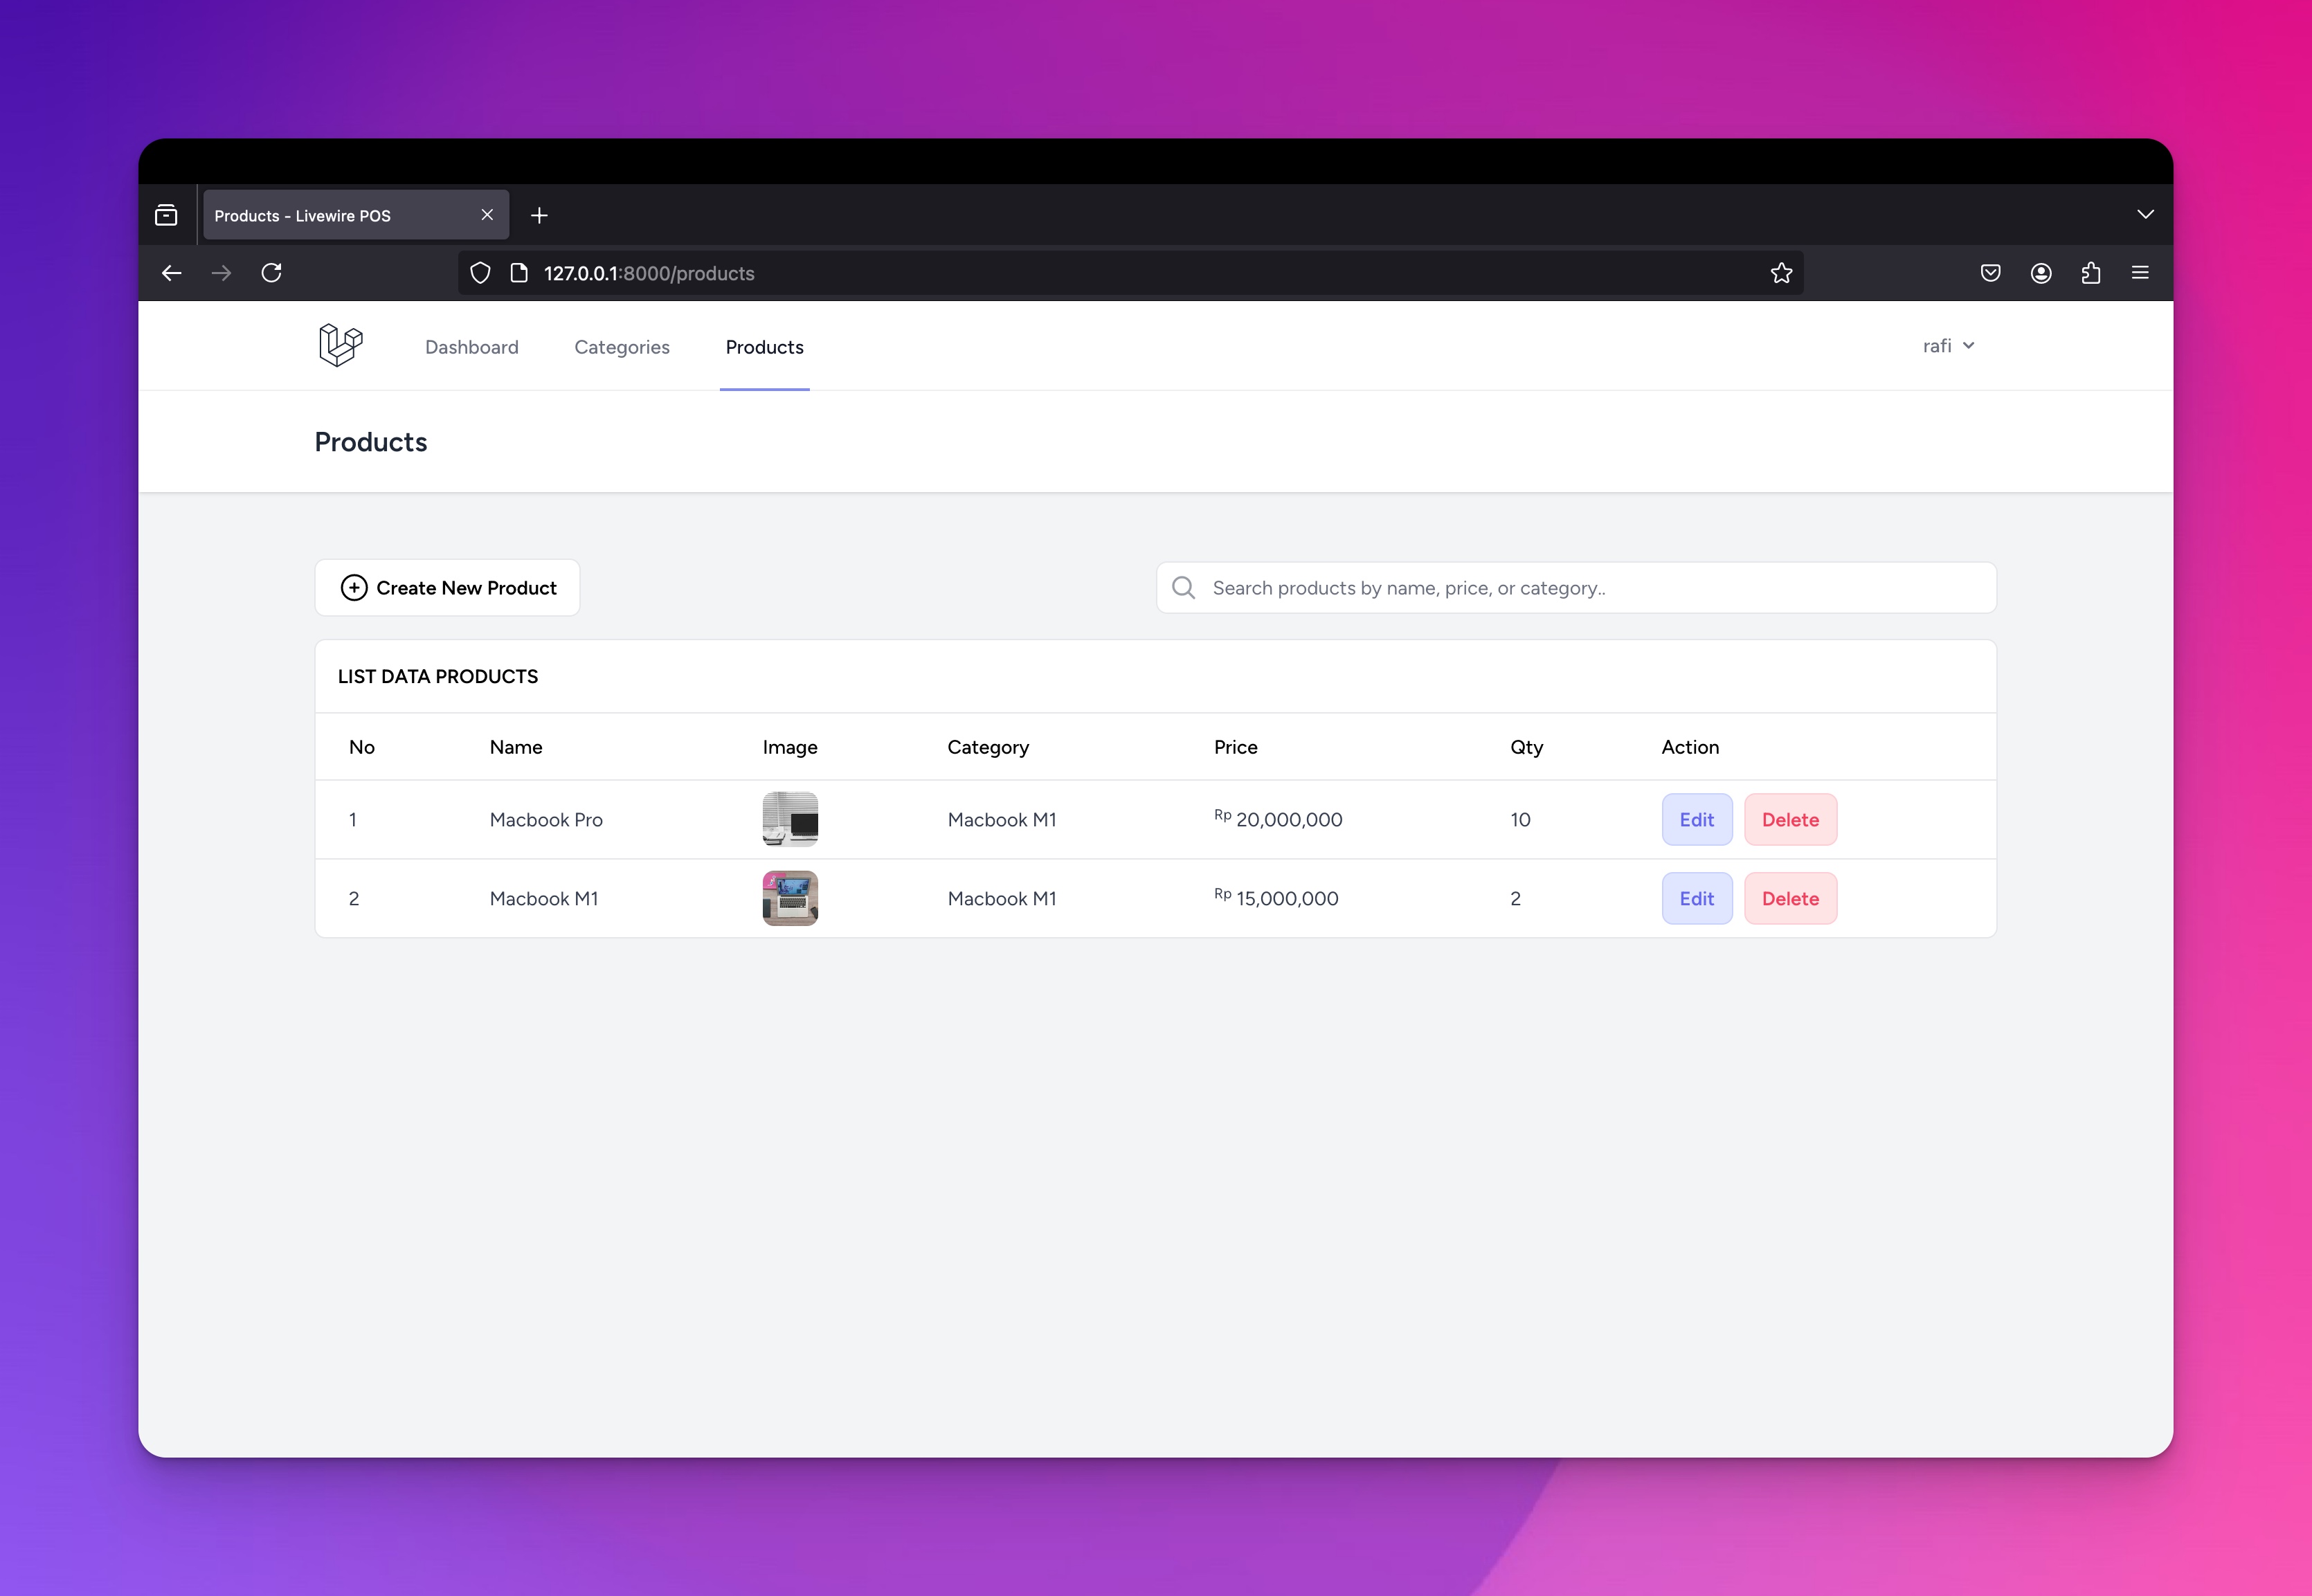
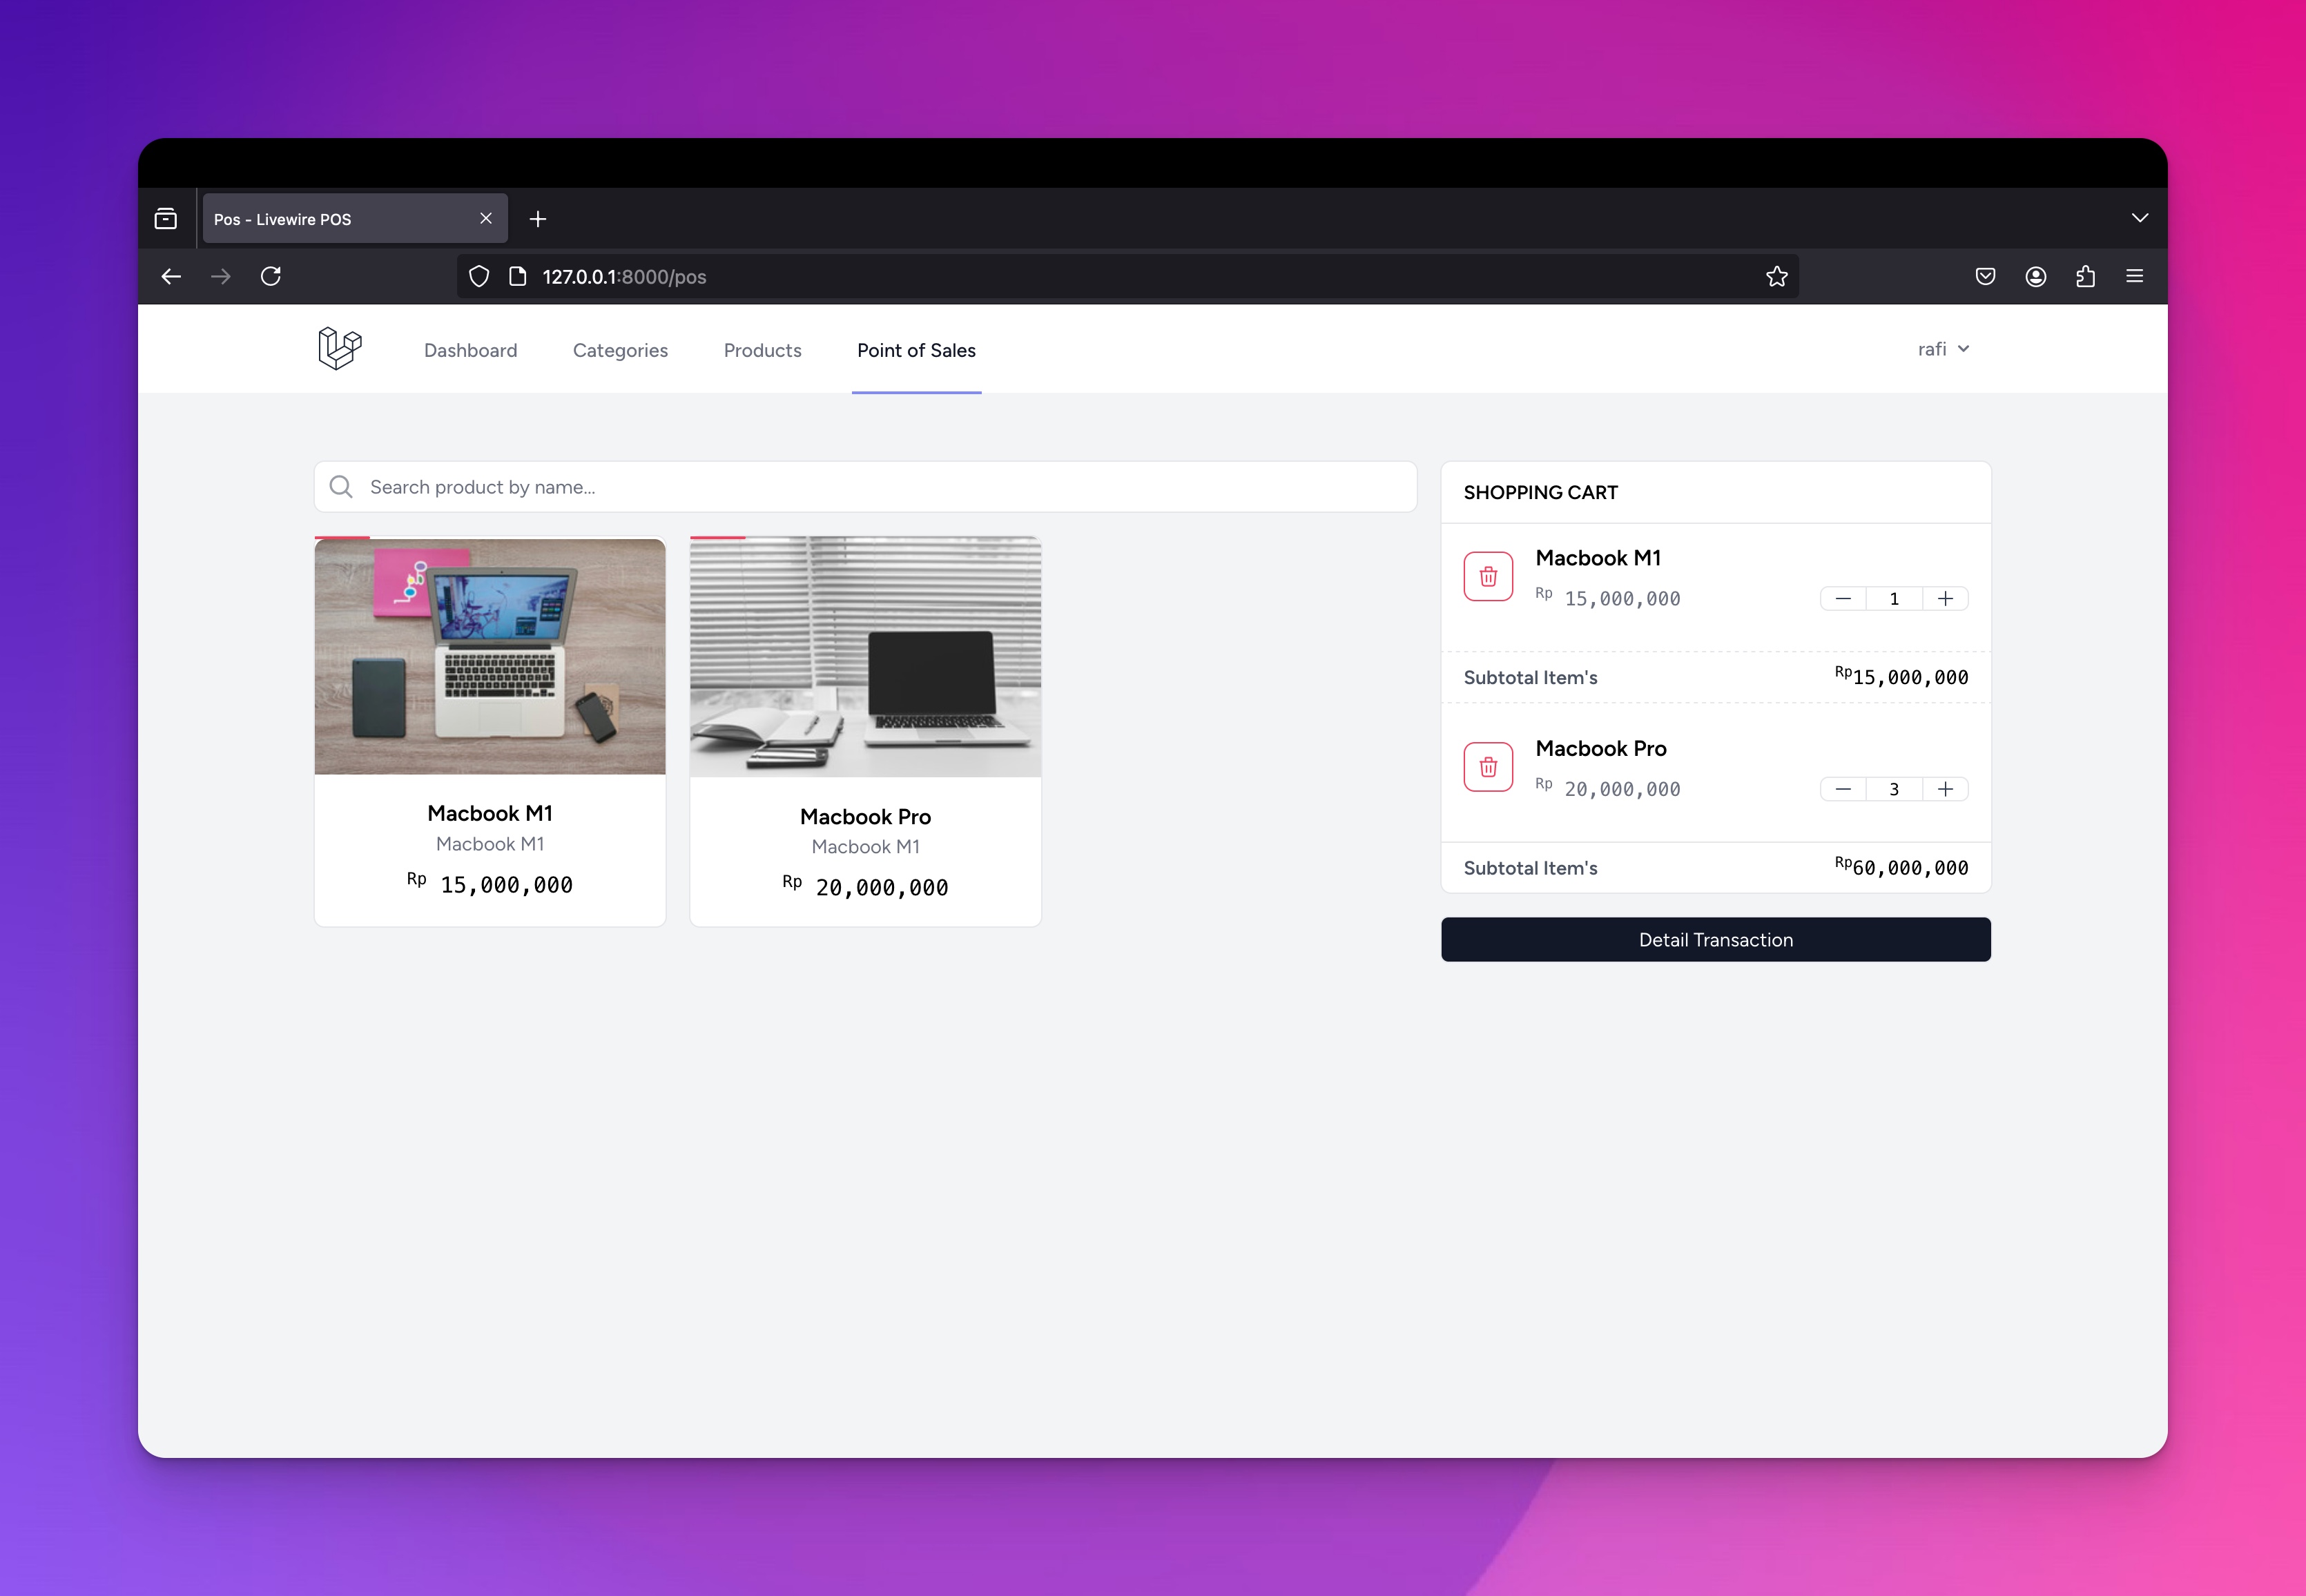
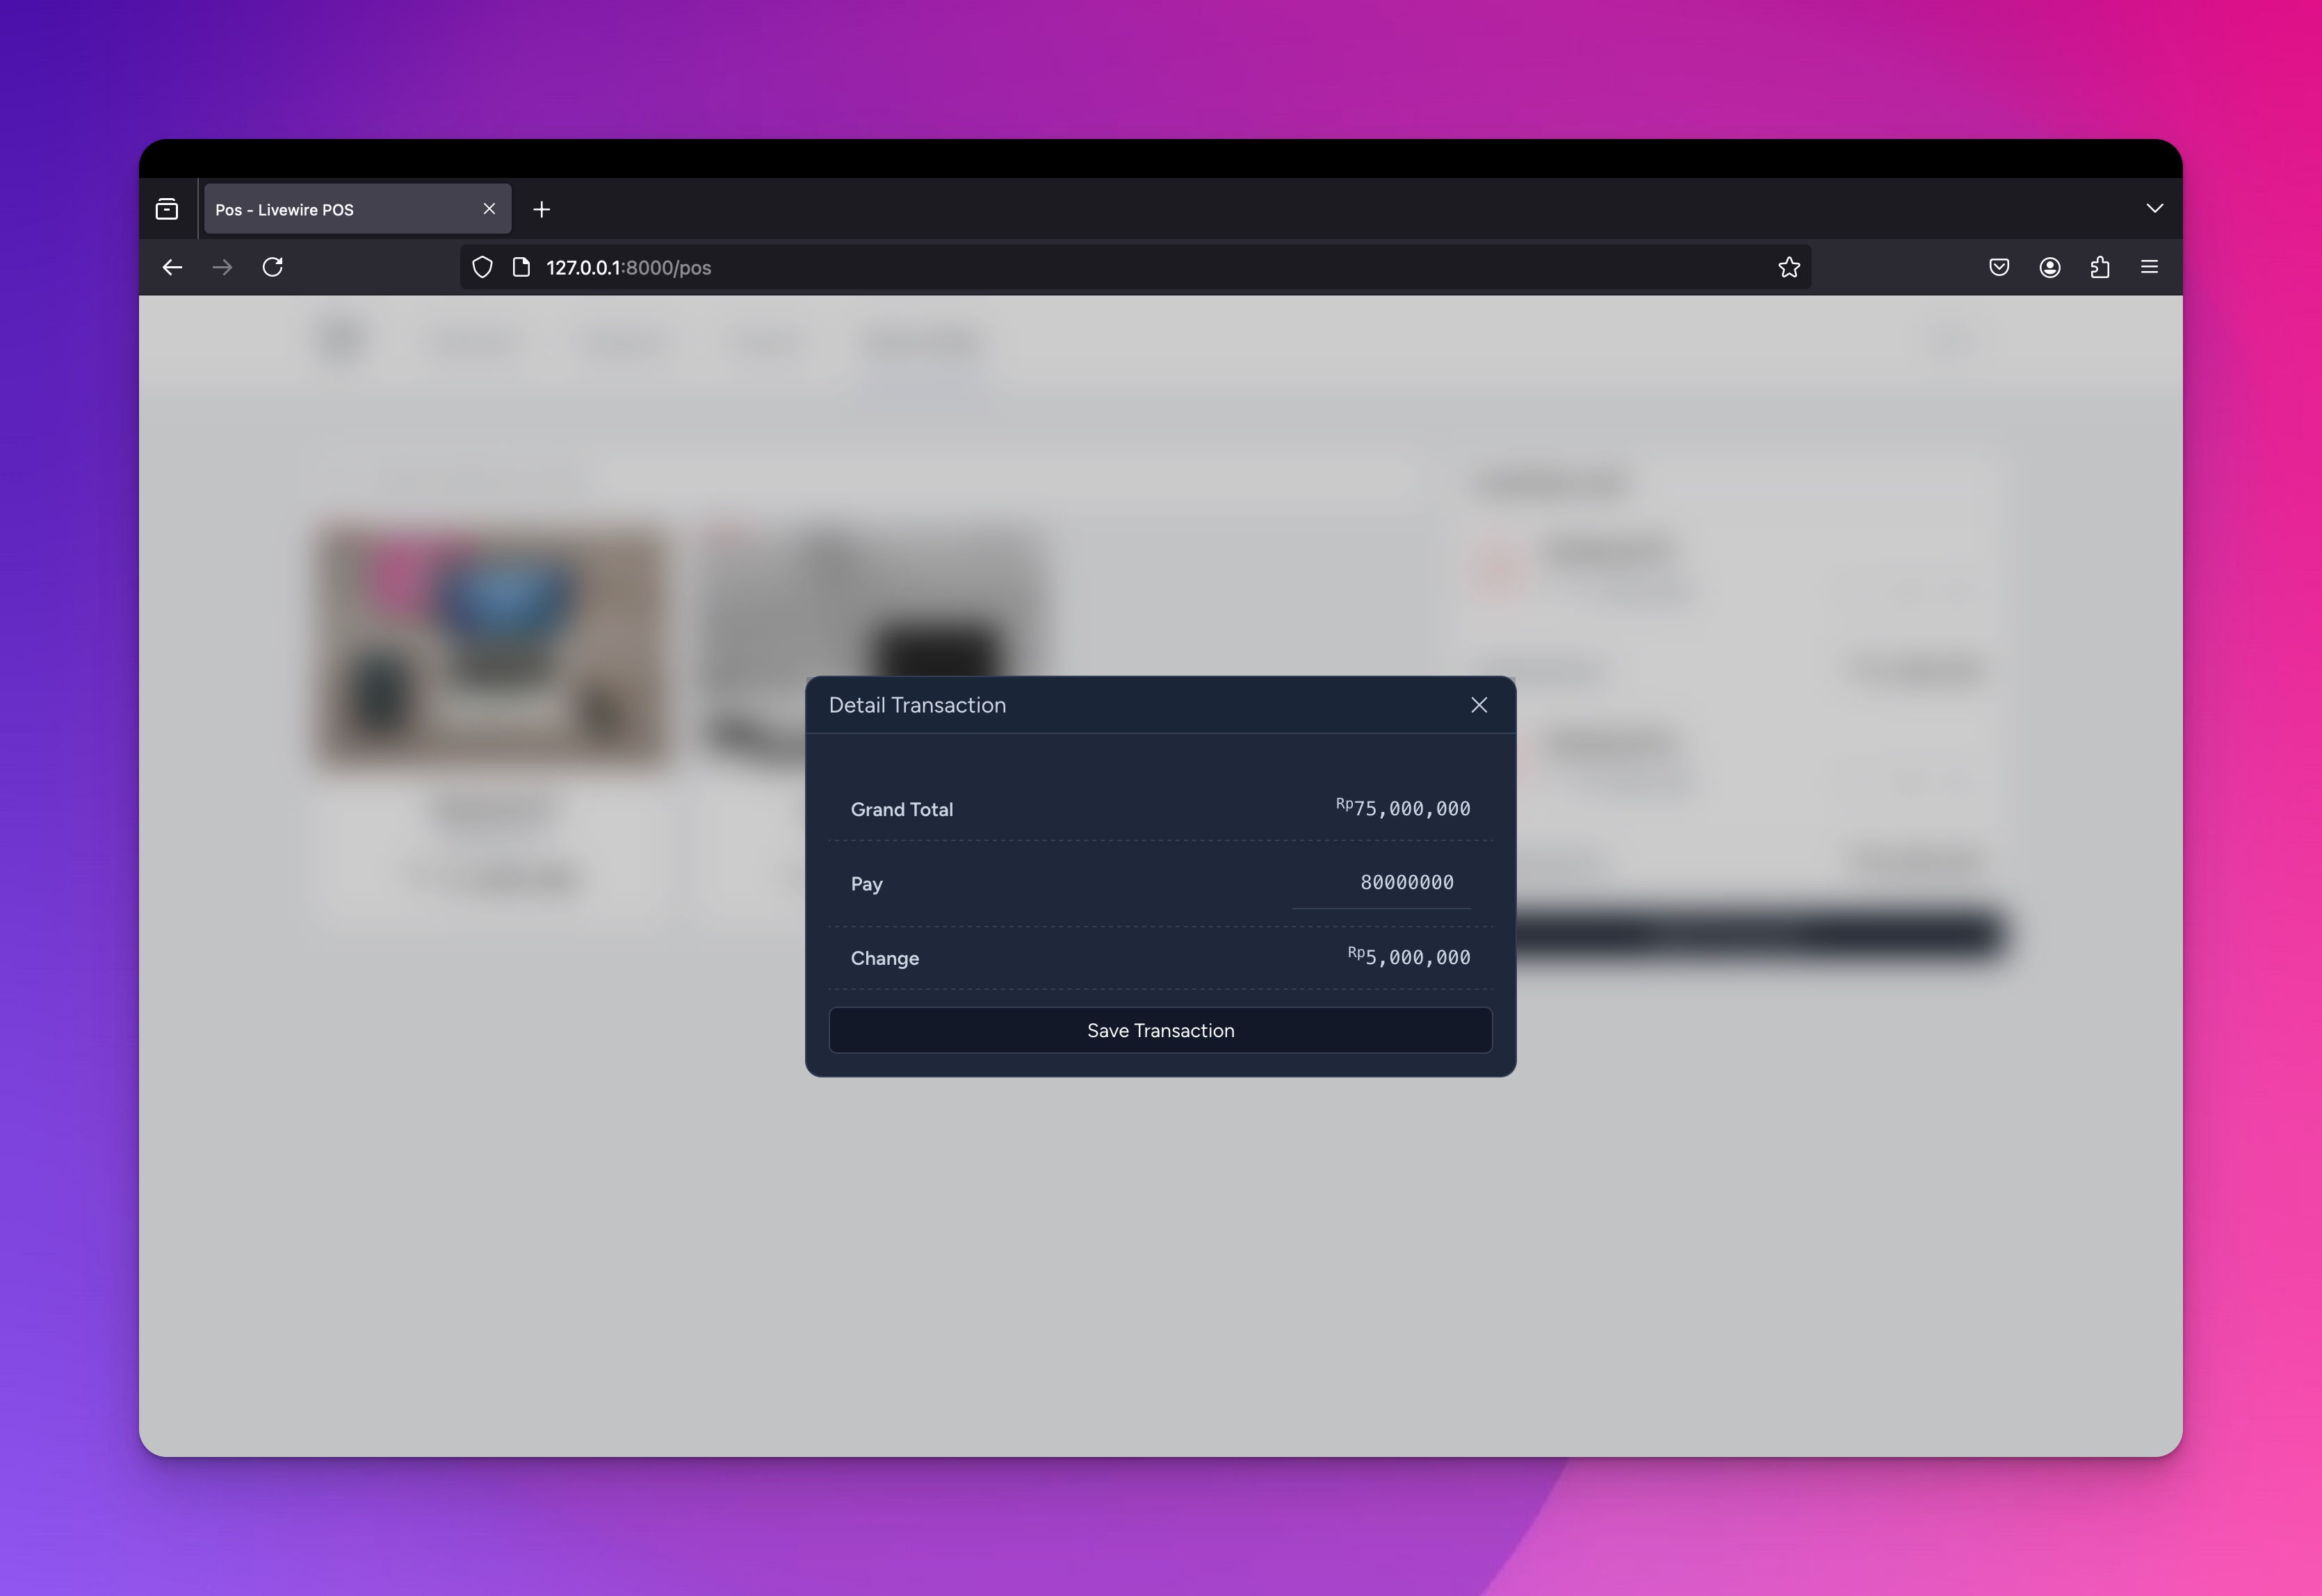
¶Penutup
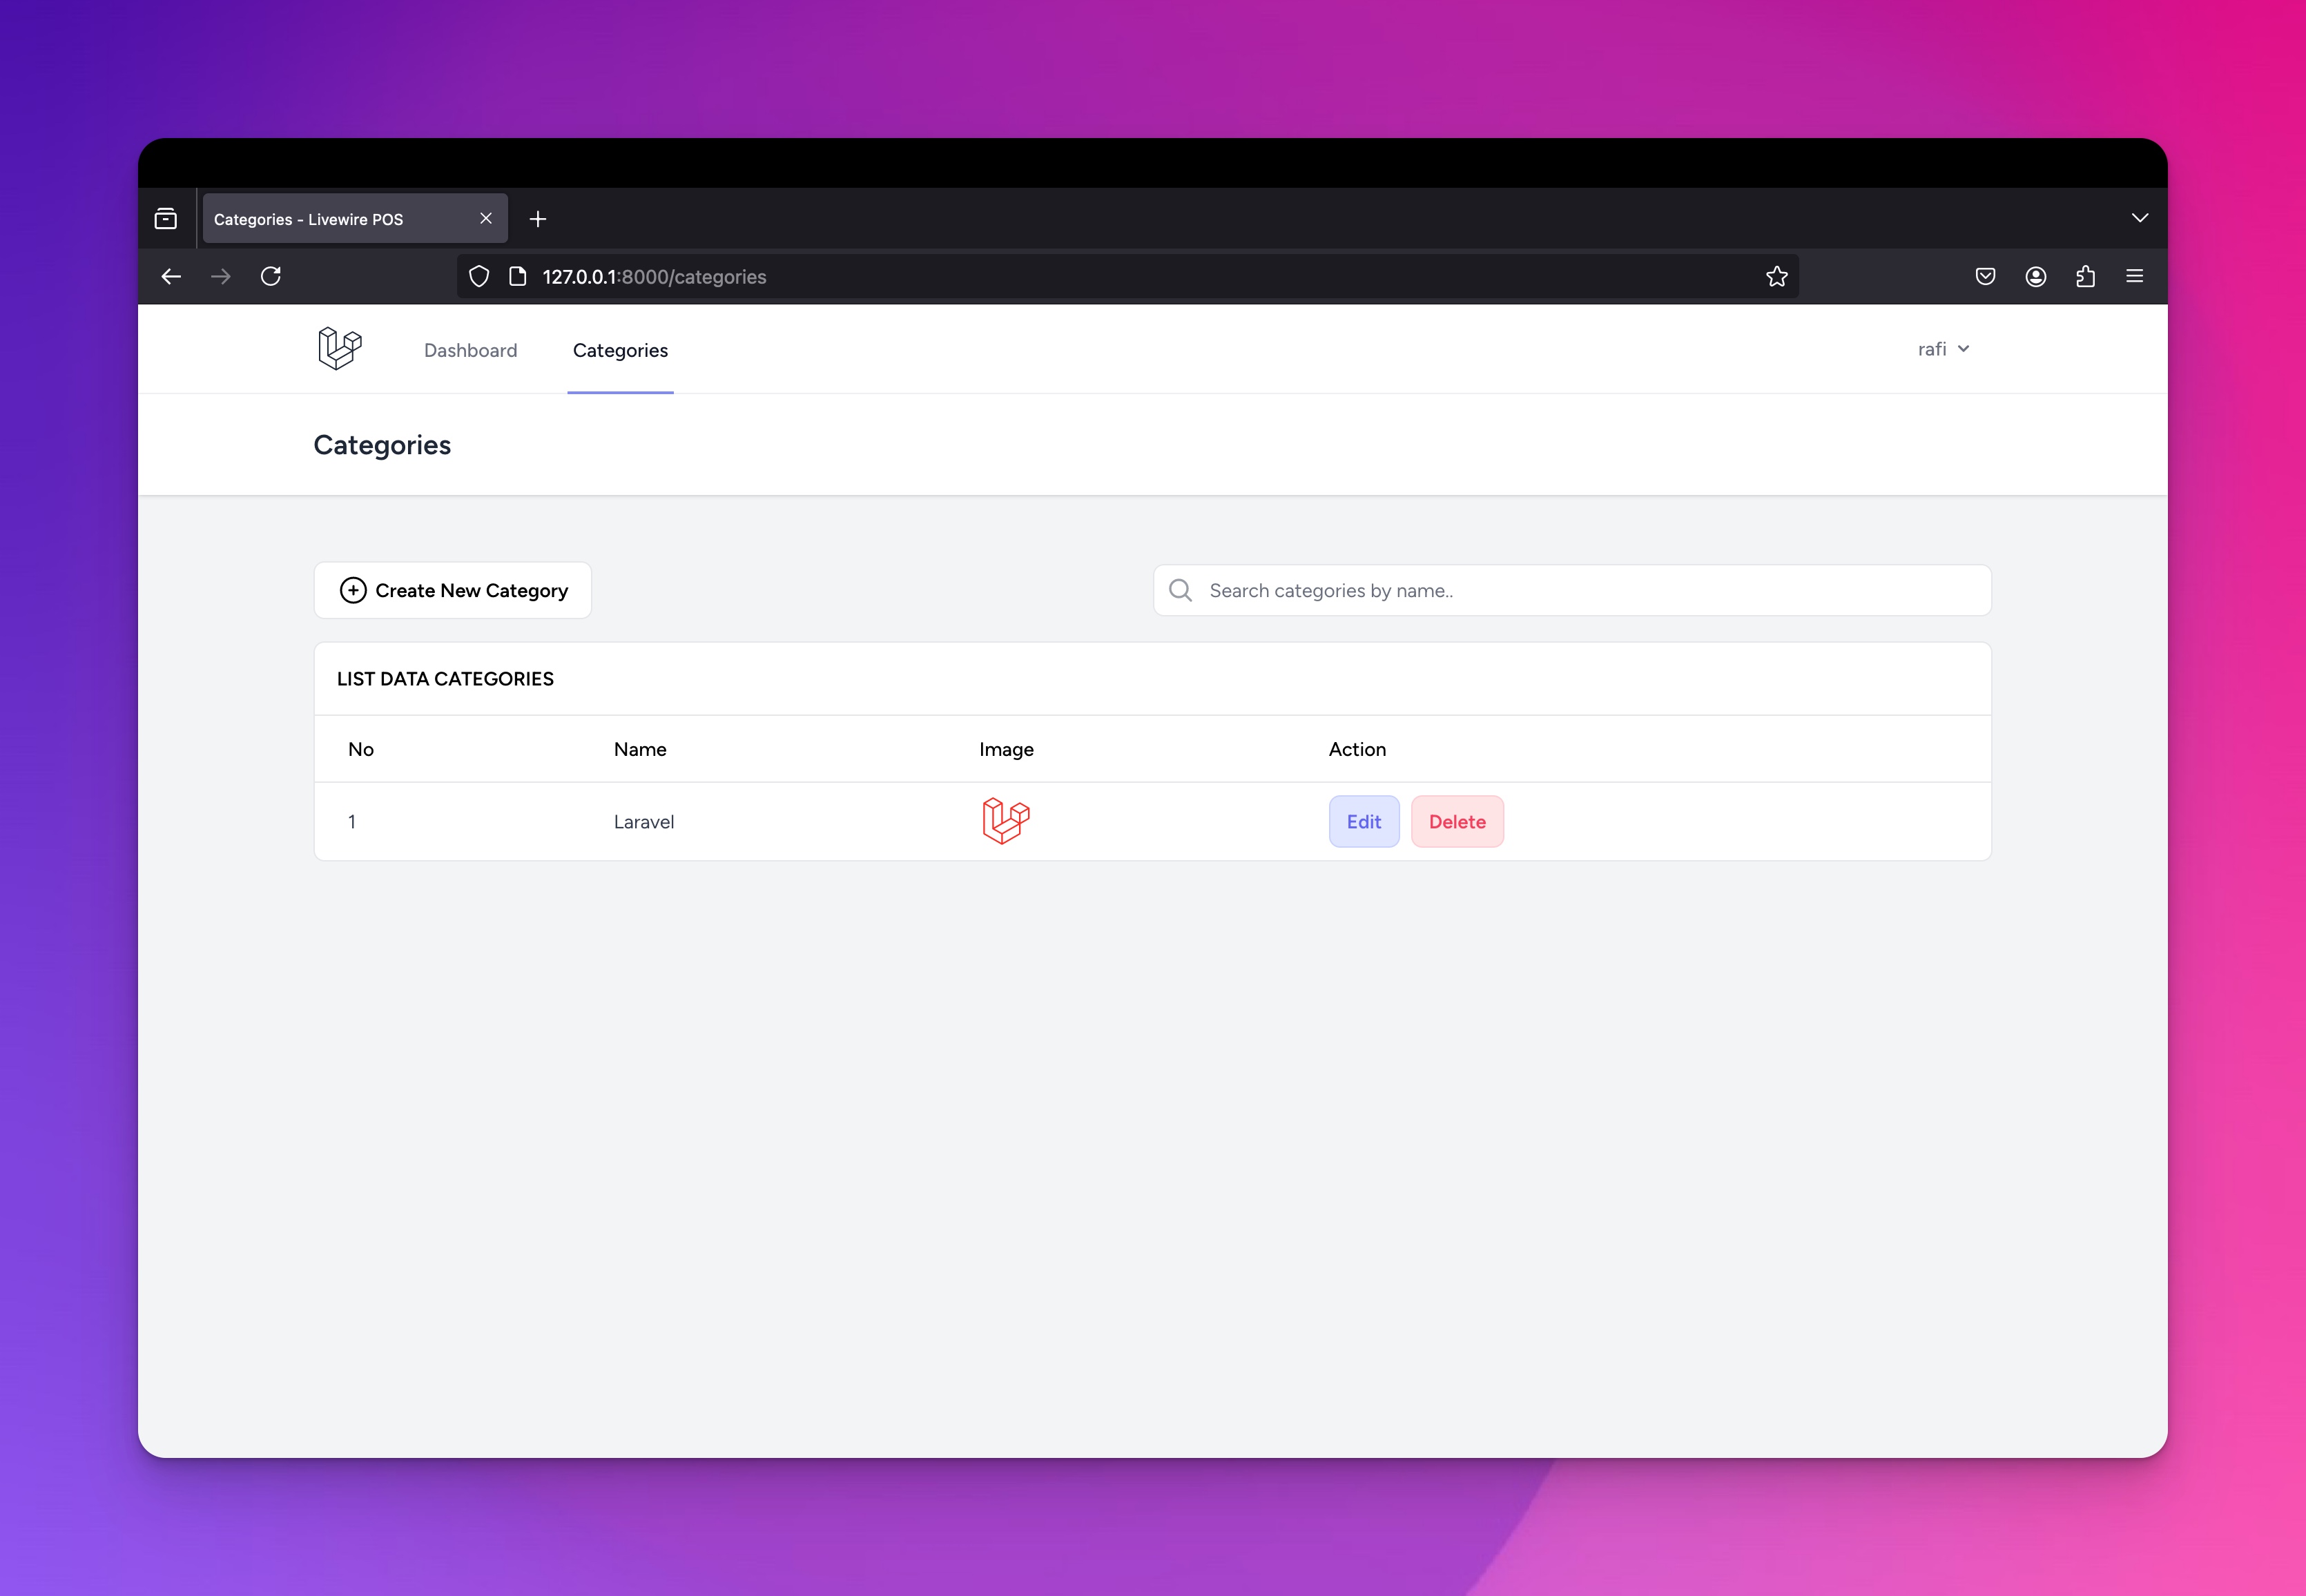
Pada artikel kali ini kita telah berhasil menyelesaikan pembuatan module dashboard, dan ini merupakan artikel terakhir dari seris Tutorial Laravel Livewire Study Case Point Of Sales, saya ucapkan banyak terimakasih kepada teman - teman yang sudah mengikuti seri ini dari awal sampai akhir, jika ada pertanyaan bisa langsung ke telegram saya Rafi Taufiqurrahman. nantikan seri - seri selanjutnya dari saya, semoga bermanfaat terimakasih : )


